Showing posts with label diy. Show all posts

Saturday, June 15, 2013

Found it on Pinterest - Envelope Pillow DIY

While Baby D was napping last weekend, I took the three hour window of opportunity to brighten things up in the living room. We have only decorated minimally in this space so far, purchasing a cream-colored shag rug from Costco. With the brown leather sofa and matching chair and ottoman, it's looking a bit "doctor's office" without any personal touches.

I found a DIY link on Pinterest for sewing up Envelope Pillows. Super easy and super fast! I had three pillow covers done before the baby woke up.

 photo 003-24_zps72285834.jpg

I didn't have to buy a thing. I used pillow forms I already had (from Ikea) and fabric I'd purchased about three years ago and never got around to using.

 photo 004-25_zps37f44fde.jpg

Look closely at the dark blue and cocoa brocade print on the right...those are goldfish in the center of the design!

And the backsides are cute too.

The tutorial recommended using plain fabric on the back but I know that my pillows will never just be sitting pretty on the sofa. They will be tossed all over (in fact they are laying on the floor right now, as my husband was taking a nap with them!) so I wanted them cute from all angles.

 photo 005-27_zpsc9eca3c7.jpg

 photo 006-31_zpsa42fd137.jpg

And when he woke up from his nap, someone was very happy to pose for pictures on my newly decorated sofa!

 photo 007-33_zps707ed66c.jpg

Pillowcases before (pic from our apartment):
 photo 023-3.jpg

Pillowcases after:
 photo 003-24_zps72285834.jpg

Tuesday, December 4, 2012

it's a small world...after all!

001-24

Can I just start off by saying how much it broke my heart to see how unfocused my photos were? I'm not kidding, when I got home after the end of the long party day and uploaded these, I wanted to cry.

013-13

They didn't look blurry at all when they were 1.5" thumbnails on my camera display. The disappointment of working for a month on something and then not have anything to show for memento, what a bummer!

007-31

And because I had the camera around my neck and was so busy with cooking/baby wrangling/opening gifts/handing out cake, I didn't get to take as many photos as I would have liked. Did a take any photos of the paper decorations I so carefully crafted by hand? No. Did I get any snapshots of the party guests? Nope. Did I even get a decent photo of the birthday boy in his custom appliqued attire? Nopety-nope. sigh...Next time I need to remember to hand my camera off to someone else!

010-22

Oh, well, now that I have that off my chest, here is what I have to share of Baby D's "it's a small world" themed birthday party!

005-25

The party was a success! We had 23 adults and 17 kids in my parent's yard. Fortunately it was a gorgeous day and the weather was perfect for an outdoor party! My dad hung the paper decorations I'd made outside, one from the tree and the other two dangled from under the eaves of the house (you'll have to use your imagination on this but in my opinion they looked wonderful!).

We served rotisserie chicken, a homemade baked macaroni and cheese, potato salad, mixed green salad and corn bread for lunch. The yellow cupcakes had chocolate frosting and adorable paper flags.

003-23

I made sugar cookies and iced them the night before. I bought sweet little pastel colored candies to accent the center of each whimsical flower.

015-21

I set up all the desserts on one table (the area with zero light apparantly, since all my photos came out looking like my hands were shaking when I took them, blah!).

006-30

I crafted paper pinwheels out of scrapbook paper and hung them with twine from atop the buffet.

008-21

We lined up the parade of handpainted (by me) wooden characters along the dessert table and each child was able to choose their favorite to take home with them. This was a very popular party favor, I think!

004-23

On the opposite wall, I strung twine and used tiny wooden clothespins to display some of Baby D's photos. So great to see how much his sweet face has changed over the year!

012-12

I freehand iced the top of the cake with the friendly face from the clock on the ride at Disneyland.

024-11

040-4

Baby D loved when we all sang to him. We'd been practicing it for weeks at home so he'd get used to the song.

037-7

He even did his "twinkle twinkle" fingers along with the singing, so cute!

044-4

And the cake? Well it was a white cake that I colored and made with a rainbow technique. Quite easy to do and everyone was wild about it! There was not one slice of cake left. I'll have to do a tutorial!

046-9

As you can see, Baby D loved his slice too!

060-4

061-8

Thank you to everyone who came out and enjoyed our son's special day with him!

053-7

Friday, October 5, 2012

Party Planning {Handcrafted Paper Decorations} -The Big ONE

So in less than two months, my little guy will be turning ONE!


Of course, I'm already party planning!


Duh, been doing that for months already, pinning cool ideas. But now it's time to move into action and start the actually hands-on creating.


My big 10 month old boy!
In between sewing up a million of these that I've gotten orders for from Etsy...


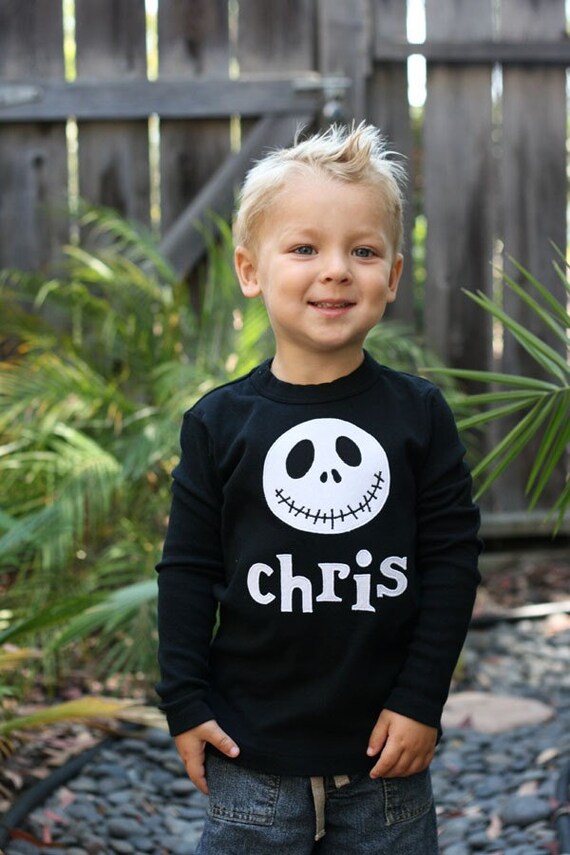
And between getting the Halloween costumes done...

Halloween hint, Uploaded with Snapbucket (Original)
A little costume hint...

I'm planning on making a few very easy decorations for the party. Something cute and practical that can be reused for the next party, for sure. And I plan on keeping the buying to a minimum (my husband thanks me for that!), so I'll mostly be using what I have on hand.

I have large stacks of cute scrapbook paper in storage at my mom's house, so I'm going to haul that out next week and see what I have to work with.

Here are a few of the paper projects that I hope to try my hand at:


A banner for the cake


Mini pinwheel decorations


What about these little pinwheels attached to clothespins? These would be sweet clipped to the top of a favor bag


These paper strip mobiles look easy, huh?


Definitely want a display of Baby D's photos through the year, this banner is the start of a good idea.


Another fun one, just need to get a circle cutter though...


This one would need a circle cutter too...

Source: etsy.com via Shelby on Pinterest


And more circles...


These stars could be reused for Christmas decorations too


Well now, that's about the cutest thing ever!! I love the wavy flags!


Okay, so it looks like I should have been getting ready for this, oh, maybe back in February, right?! I'll start working on it next week for sure. And probably teaching the older kids how to use a circle cutter!

Monday, October 10, 2011

Halloween Past

I'm in the process of designing and sewing the kid's costumes for Halloween. I don't have much spare time so it's been done in bits and pieces but I'm very close to completion!

I'm all for handmade, but even that can get pricey so I try and use a mix of inexpensive store-bought, hand-crafted and stuff we already have on hand.

Currently I have about half of the kid's costumes done for this year. I only had to buy 2.5 total yards of striped fabric and the rest is fabric or accessories that I already owned. So I'm getting by on about $15 cost for two costumes, not too shabby! They decided that they wanted to coordinate and I'll be finishing up their outfits this week and hopefully head out for some photos that I can share. I still need to complete the top for The Girl and make some sort of hair piece (probably a coordinating bow) and the The Boy needs pants and a head scarf too. Any guesses on what they wanted to be?

I've made Halloween costumes for The Boy for years. He expects that I can make him whatever he wants and since he has a wild imaginination, I often have to rein him in on what I can and can't do! In the past, we had season passes to both Legoland and Sea World and went to their Halloween festivities for a few years.

Photobucket

Between Halloween parties, carnivals, and the actual day, our costumes definitely get some use! And in many cases, the costumes are handed down to my nephew the following year.

For the first two years, I didn't have a functioning sewing machine, hence the store-bought costumes.

His first year, he was just 10.5 months old and his dad bought this Panda outfit for him.
Photobucket

His second year, I found this Dumbo costume that I could not resist! There is even a tiny Timothy mouse in the hat.
Photobucket

Photobucket

This Gnome costume was completely homemade by me and he got so much attention in this. Surprisingly he didn't even mind the tickly beard! I just made a simple tunic top, trimmed in bias tape and sewed on a band of red at the waistband to imitate a belt (complete with a sewn on buckle). The pants are just a thick corduroy and the felt boot covers match the hat. I attached a simple band of elastic (coated with a bit of foundation make-up to blend in with his skin tone) and then sewed on this bit of white fur to mimic a beard. I even sold this set as a custom on Ebay.
Photobucket

This store-bought Jack Sparrow costume inspired by The Pirates of the Caribbean was a hit. The hat is vintage 1970s from my brother, and will likely be worn again this year...hint hint!
Photobucket

This Indiana Jones costume was one of my most favorites. He wore his own boots & pants, I tea-dyed a white shirt to look khaki, and the satchel, whip and hat were store-bought. He totally embodied the character, it was a perfect fit for him!
Photobucket

My nephew is wearing a Spiderman outfit I made 9 years ago for my stepson! I had a basic unitard pattern and then just reworked and pieced together the color pattern (using his Spiderman action figure as inspiration). The web design was drawn on with a Sharpie.

Hollywood SuperStar Spider was The Boy's creation from start to finish. He knew EXACTLY what he wanted this costume to look like. I made a simple tunic with a spider-print overlay in the front. The arms were stuffed and attached to the sides of the tunic and then attached with fishing line to the sleeves. I made the top hat out of a cardboard cereal box, rolled up and hot glued then covered with coordinating fabric and then attached to a headband. Grandpa designed the cane from a piece of PVC piping.
Photobucket

This was last year's costume, Tree Man. To be truthful, he wanted to be a bush. He'd seen a show about stealth military guys who hide out in the brush, completely camoulflaged. Unfortunately the cost of silk leaves was prohibative and I asked him to settle for being a tree instead. He told me basically what he wanted and I set to work. I covered an old fishing hat with some green fabric and then hot glued on silk leaves. Same for a cheap Wal-Mart tee. We added a little grapevine nest and a faux feathery canary to the top! He still enjoyed pretending he was a bush, squatting down on the lawns as we trick or treated and then jumped out to scare people!
Photobucket

Last year was my first time making a costume for The Girl. We took a trip to the fabric store together and she chose these pretty jewel tones and the lovely wings (already made, hurray!) to create a Forest Fairy look. I mixed in the black accents on the collar, belt and tights to match the wings. The collar was an afterthought...turns out the top of the dress was much too large and I needed to come up with something that would hold it in place and not fall off her shoulders. So I just made a simple collar with straps that attached to the collar and to the dress bodice and then tied with a ribbon at the nape of her neck. I hotglued on some faux jewels that I had on hand. I also already had some big sequined butterfly clips so we secured those in her hair and she was ready for twirling!
Photobucket

Can't wait to see how the kids look this year. My son has already had a lot of input into what he'd like for the costume and is excited on what I have done so far. The Girl is just happy that her skirt is really twirly!